Warm-up
Warm-up is a must-do before starting any activity. To gain the most from your yoga session and to focus on your knee flexibility and stability, here are some warm-up exercises. Begin with some simple stretches and movements to get your body ready:
- Simple stretches
- Movements
Cat-Cow Pose
The Cat-Cow Pose is a great warm-up! Start on all fours in the tabletop position – palms flat, shoulders and knees apart. Keep your spine neutral.
- Inhale and arch your spine like a cat. Tuck in your chin and look up.
- Exhale and sink into cow pose. Draw your shoulders back and down. Make your belly into a dome shape.
- Hold this and take note of how it feels in different parts of your body.
- Imagine creating space between each vertebra of the spine. This will help stability around the knee and increase flexibility in your hips and shoulders.
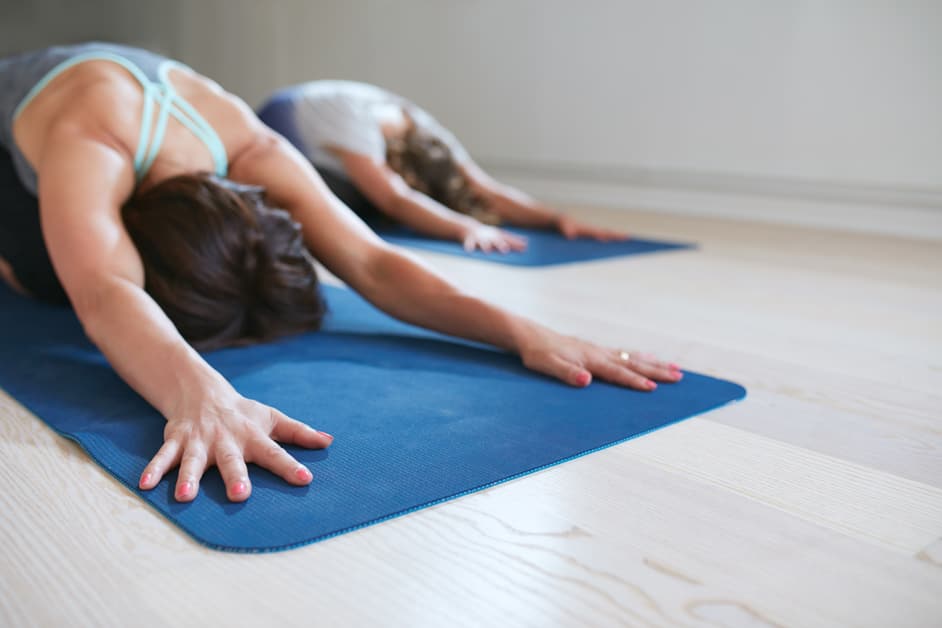
Child’s Pose
Child’s Pose is a fundamental yoga pose. Start in a kneeling position, arms stretched out. Extend your arms and make sure your knees are hip-width apart. Gently fold your body forward. Let your head come close to the floor. Engage your core and press your hands and forearms against the mat. Hold for 30-60 seconds. Then slowly release and return to a kneeling position.
This pose is great for both stability and flexibility in the knees. It helps to stretch your hamstrings and strengthen them. It also engages other leg muscles like quadriceps and calves. It can help to reduce tension or stress in the neck region.
For those with knee pain due to arthritis or running injuries, Child’s Pose can be especially helpful. It reduces strain on the joints while providing gentle support.
Downward-Facing Dog
The downward-facing dog is a popular yoga pose. It builds strength and flexibility in the hips, legs, and shoulders, and increases cardio endurance. People with knee issues can benefit from it by improving stability, balance, and knee flexion.
Begin on an even surface, with your hands at shoulder width apart. Point your toes outward slightly, so your feet look like an isosceles triangle with the long side pointing downward. Firmly press into your wrists. Draw your shoulder blades up towards each other and down away from your ears. Press into all ten fingertips evenly for support. Lift up onto your toes as much as possible and then lift each knee off the ground one at a time until your legs are straight.
Focus on the tips of your fingers. Press firmly into the mat to lift through the chest towards the ceiling. Keep your hips squared forward, looking towards the abdomen area. Don’t strain your neck or shoulders. Use ujjayi breath to help fluidly move through the pose. Every time you exhale, gently tug up on the stomach to create more space and ensure good posture.
Hold the down dog pose for 5 to 15 breaths. Carefully wiggle out of the position without any sudden jerky movements. After you have completed the pose, take a few moments to rest lying flat on your back with some gentle stretches before beginning the next sequence.
Stretches
Knees are vital! So, to keep them healthy, stretches and exercises must be done. A yoga routine specifically for knee health can help you. Here’s a yoga sequence to improve your knee flexibility and strength. Get ready to see a difference in your range of motion and less pain!
Reclining Hand-to-Big-Toe Pose
Reclining Hand-to-Big-Toe Pose (Supta Padangusthasana) is the perfect stretching exercise for the quads and hip flexors. It is great for increasing knee flexibility and stability, as well as the hips range of motion.
To start, lie on your back. Pull your right leg up towards your chest and grab the big toe with your first two fingers and thumb from each hand. Alternatively, you can use a strap around the arch of your foot for support. Lift the leg high up for a deeper stretch on your quads and hip flexor muscles. Breathe deeply to increase muscle length in this pose and feel the tension melt away. To come out of the pose, slowly release your grip or use one hand at a time to lower both legs back onto the mat. Spend 1 – 3 minutes before transitioning out of this posture and move along with your breath.
Reclining Hero Pose
Reclining Hero Pose (Supta Virasana) is a restorative yoga posture. It helps stretch the hip flexors, groin, hamstrings and quads. It also strengthens the knee joints and provides stability. It’s best to practice this pose on an even surface.
To do it:
- Start in Tabletop position on your hands and knees.
- Slowly lower your hips to your heels.
- Extend your back for a deeper stretch by bringing the chest towards the floor. Keep the arms relaxed at your sides.
- Reach your arms away from your body or rest them along the side. Make sure you keep even contact with both hips and heels throughout the stretch.
- Stay in the posture for 10-15 breaths.
- Come out of it slowly with an inhale.
Half Splits
Half Splits, also known as Ardha Hanumanasana, is a yoga pose that improves knee flexibility and stability. It isn’t easy to do, but with practice the full version can be achieved. For beginners, the Half Splits are a great way to get comfortable with the pose before doing the full version.
Start in Tadasana (Mountain Pose). Step your right foot about 3 feet in front of your left, with your heels aligned. Bend your front knee. Keep your back leg as straight as possible. If your inner thigh gets too tight, place a rolled up mat or blanket between the two legs for support.
Exhale deeply and bend at the hip area towards the bent leg. Keep your hands on either side of the bent knee, but don’t press down heavily. Keep your back foot flat on the ground with toes spread apart, and keep steady depth when you inhale.
If you pull too much weight into one side or lean far to one side, redo steps 1 and 2 with balance. Inhale deeply and return to the starting position. Push firmly into the hands (or blocks) against either side of the bent knee and bring your torso upright. Aim to be slightly past vertical.
Meditate on the lengthening, softening toe hairs, exploring gravity away from the spine, engaging the core abdominal wall for support, and engaging the pelvic floor area for lifted awareness. Switch sides, or split both feet, after several repetitions until you are familiar with the posturing.
Half Pigeon
Half Pigeon pose is great! It stretches tight hips and helps knee stability. It also relieves tension in the lower back and upper legs.
- Start in tabletop position. On hands and knees.
- Lift right leg behind. Knee under hip. Straighten leg as much as possible.
- Inhale deeply. Exhale. Move lower body toward the ground. Push left hip toward the floor. Back stays straight.
- For a deeper stretch, press onto elevated shin bone. Or reach back with hands over foot/ankle.
- Hold pose for a few breaths. Return to tabletop position. Repeat on other side.
Strengthening
Yoga is an awesome way to boost the durability and steadiness of your knees! It can improve your flexibility, balance, and strength – all of which are fundamental for knee health. Through certain poses, you can focus on the muscles that provide support to the knee joint. You can make them stronger, plus enhance your knee stability and flexibility.
In this article, we’ll explore the finest yoga poses for knee strength and flexibility:
Chair Pose
Utkatasana, or Chair Pose, is a foundational yoga pose that can help to boost lower body mobility, flexibility, and stability. This pose strengthens the core abdominal muscles, hip flexors, and surrounding thigh and knee muscles.
To begin, stand tall with feet firmly on the floor. Take an inhale and raise arms over your head, with biceps touching ears (or in prayer position). On an exhale, bend knees equally, as if sitting in a chair. Imagine sitting in a sandcastle, and make sure thighs are parallel to the floor. Keep back extending energetically away from hips. Shoulder blades should engage away from the neck. Hands should be fully extended overhead.
Hold this pose for 15-60 seconds. Focus on breath. Keep dynamic tension active throughout connected muscle groups. Don’t strain. Release this posture on an inhale by straightening legs at a gradual pace. Return arms to sides of body, and remain firmly rooted into Earth’s surface. Balance strength and stability throughout entire musculoskeletal system.
Warrior I and II
Warrior I and II are classic yoga poses. They help to strengthen muscles and improve knee flexibility. They form a well-balanced flow practice. Both poses are important for knee strength and stability.
Warrior I starts with Mountain Pose (or Tadasana). Feet together, arms by sides and palms facing forward. Step back so that legs form a triangle shape. Bend front knee slightly, so thigh is parallel to the floor. Raise both arms above head until fingertips meet. Keep shoulder blades pressed against back. Engage core and hold for two breaths. Then back to Mountain Pose for a few breaths of rest.
Warrior II is similar to Warrior I, but with a difference. Open arms away from sides until shoulder-width apart. Palms face down towards Earth. Bend deeper into front knee, keeping it over ankle joint. Simmer deeper as time passes and keep control. Reach an angle of ninety degrees or more to engage muscles. Hold for two breaths. Then release back to Mountain Pose. Do restorative recovery breathing exercises. Then transition to Warrior I or other postures in the sequence. This helps to amplify flexibility and stabilize the body.
Triangle Pose
Triangle Pose, or Utthita Trikonasana, is a yoga pose. It stretches the sides of your body and strengthens your legs and torso.
To practice it, start in Tadasana (Mountain Pose). Put your feet hip-width apart. Reach out your arms to either side. Point your right foot forward. Rotate your left foot outwards at a 45-degree angle. This will help your hips stay level. Exhale and lean to the right. Reach for your ankle or a block outside it. Reach up your left arm with your palms facing each other. Gaze up at your left hand for balance. Keep your neck natural. Extend from your shoulder blades to the crown of your head. After five deep breaths, exhale and return to Tadasana. Repeat on the other side.
Regular practice of Triangle Pose can build core strength. It can also expand mobility and flexibility in your spine, chest and hips.
Tree Pose
Tree Pose is iconic. It helps build lower body strength, coordination, knee flexibility and stability.
- Begin with feet together and arms at the sides.
- Inhale, lift right foot and place it flat against the inside of left thigh or calf. Make sure both legs are evenly distributed.
- Reach arms up above head and keep shoulders relaxed.
- Stay or close eyes, deepen breath and lengthen spine.
- Hold for 30 seconds or 4-8 breaths.
- Slowly exhale and release back to standing.
Cool Down
Once you’re done with your yoga, it’s crucial to cool down. To restore your energy and flexibility, ease your body back with stretches and slow movements.
This article explains how to cool down and stretch after a thigh and knee strengthening yoga routine.
Seated Forward Fold
The seated forward fold is both calming and energizing. It stretches the back of the legs and releases emotional tension.
- Start in a comfy seated position. Let your spine stretch and rest your hands on the sides or on your knees. Take deep breaths to shower your body with stillness and relaxation.
- Gently hinge forward at the hips and lift out through the crown of the head. Let each exhalation create length. Breathing here keeps you focused and engages inner thighs, hamstrings, abdominal muscles.
- When you can control the stretch, melt into the feeling – but no further! Create tension without pain. Enjoy how each breath brings life back to tight and stuck areas.
- Take deep breaths before releasing by inverting the hips. Tuck the crown of your head forward and rise slowly. Let any excess energy and thoughts float away.
Corpse Pose
Shavasana, or Corpse Pose, is a great way to end your yoga routine. It helps to relieve tension and pain, and also increases flexibility and posture. To do it:
- Lie flat on the floor, with legs slightly apart, and feet relaxed outward. Place palms facing up or lightly crossed over your abdomen.
- Close your eyes and let your body completely relax. Take in all the sensations that you feel in your body, and acknowledge any emotions or thoughts that come.
- Slow your breathing down, and match it to the atmosphere around you. Let go of all effort and striving, and surrender yourself to the moment.
- When ready, transition out of Shavasana by bringing attention back to your physical sensations, such as stretching and connections made through asanas. Gently roll onto your right side, and draw your knees up to your chest, making sure your spine is supported by your hands. Allow several minutes to connect before concluding your practice session with final relaxation.
Legs-up-the-Wall Pose
Legs-up-the-Wall Pose – a.k.a. Viparita Karani – is a calming, restorative pose. To do it, you’ll need a large, steady surface like a bed or couch. Sit next to the edge, and turn your body with either your left or right hip and side against the bed. Swing your legs up onto the surface. Extend them straight out in front of you. Then, lay your shoulders on the floor, close your eyes, and relax for 1-3 minutes before reversing the position.
This pose is great for calming your mind, boosting knee flexibility and stability, and improving your posture.
Frequently Asked Questions
Q: What type of yoga is best for knee Flexibility and Stability?
A: Yoga poses that focus on strengthening the muscles around the knee joint, such as Warrior I, Half-Moon, and Triangle, are great for improving knee flexibility and stability. Additionally, poses that open the hips, such as Pigeon and Lizard, can help to ease tension around the knee.
Q: How often should I practice this yoga routine?
A: This routine can be practiced 2-3 times a week for best results. It is important to listen to your body and take breaks when needed.
Q: What should I do if I experience discomfort while doing this yoga routine?
A: If you experience any discomfort while doing this yoga routine, it is best to stop and take a break. If the discomfort persists, you should consult with a doctor or physical therapist before continuing.