Introduction
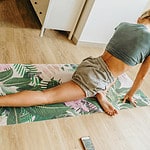
Post-workout, your body requires cooling down and stretching to avoid aches and become more flexible. Knees are notably prone to injuries, so it’s essential to do some basic yoga postures for your cool-down and stretching.
Here are a few poses to help you cool-down and stretch your knees after your next workout!
Benefits of stretching and cooling down
Stretching and cooling down after a workout is a must for athletes. It helps the body transition from an active state to a relaxed one. It also brings the heart rate and breathing back to normal. Plus, it prevents muscle soreness and joint stiffness.
Yoga poses are amazing for post-exercise cooldown. They stretch multiple joints at once. This aids flexibility in large and small muscle groups in the lower body, like thighs, calves, ankles, and feet. It can even help with knee arthritis due to strengthening muscles that support healthy joint mechanics.
These poses can be used after exercise or added to daily activities. They promote comfort with standing movements and slow paced breathing exercises:
Pigeon Pose
The pigeon pose is an awesome way for stretching your knees after exercise. It helps release tight hip muscles, boosts hip mobility and relaxes knee joints. Furthermore, it’s a calming pose for cooling down and calming your body after a hard workout.
Let’s dive into how to do the pigeon pose:
Step-by-step instruction
Pigeon Pose is a great yoga pose for cooling down and stretching your knees after exercise. It can help with hip flexibility, thigh and groin stretching, and even lower back pain and digestion.
For physical and mental wellbeing, take your time with each step. Here’s how:
- Start in a kneeling position, with legs underneath you. If it’s uncomfortable, use a folded blanket or yoga mat for cushioning.
- Bring your right leg forward, bending the knee until it’s flat against the mat. The outside of the right foot should face up.
- Slide your left leg back until the top of your thigh rests against the floor. Keep both hips square if possible.
- To transition into full pigeon pose: bring hands to chest and lean forward towards floor. Rest forehead on mat/blanket if needed. Exit safely by pressing palms either side of gluteus muscles and using leg strength to control movement out of the pose.
Benefits of this pose
The pigeon pose is a deep stretch to access and open hip muscles, while increasing flexibility. It is an intense yoga posture which can improve body mechanics, movement patterns and range of motion. Benefits include:
- More flexibility in hips, glutes, legs and back
- Releasing tightness in piriformis muscle
- Strengthening hip muscles
- Enhancing balance
- Reducing pain in body parts
- Stimulating circulation of nutrients around ligaments and tendons
- Reducing anxiety and tension in body
- Improving digestion.
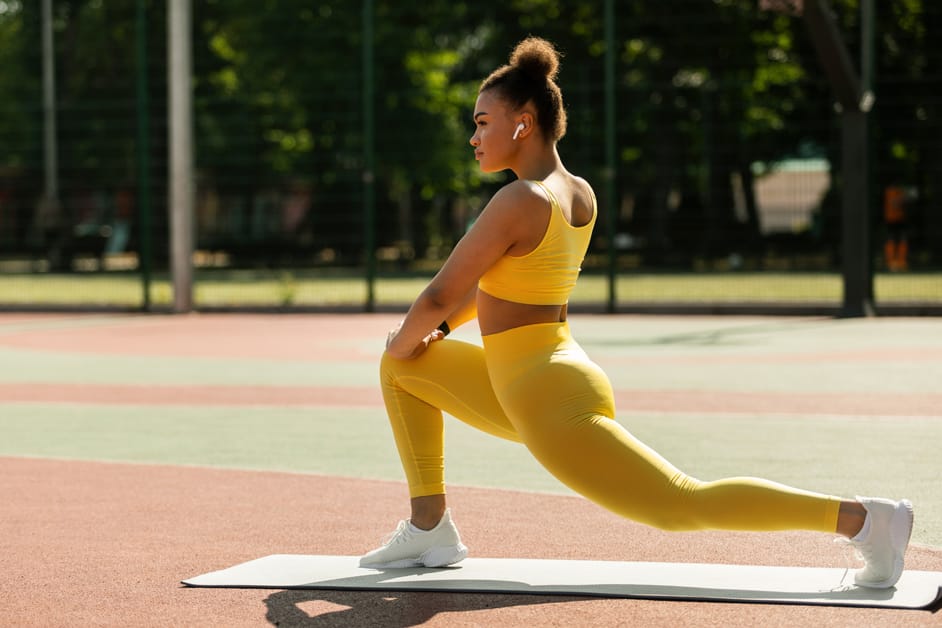
Standing Forward Bend
Uttanasana, or Standing Forward Bend in English, is a simple yoga pose. It can be used to cool-down and stretch muscles in legs and hips. It relieves stiffness in lower back and hips too. With modifications, it can help with flexibility.
Let’s look closer at this pose:
Step-by-step instruction
Standing Forward Bend, or Uttanasana, stretches your hamstrings and lower back muscles. It also energizes the body by increasing circulation to the brain.
To get into this pose:
- Start in Mountain Pose with feet parallel and slightly apart. Have both arms up over your head with the palms facing inward.
- As you exhale, bend forward from your hips. Keep your hands shoulder-width apart above either side of your feet. Go to a comfortable level.
- Bend your knees if needed. Lengthen your spine as you go deeper into the forward bend. Don’t round your back or hold tension.
- Feel both sides of your legs releasing any tension. Know that this is a safe space and no judgement takes place. Hold for 3-5 breaths.
- With regularity, this pose will open up your chest muscles and balance your back and hamstring muscles for deeper postures.
- On an inhale, slowly lift up, using your core strength first. Then straighten your legs and bring your arms overhead. Return to Mountain Pose.
Benefits of this pose
The Standing Forward Bend pose helps with flexibility in your spine, hamstrings, adductors and hip flexors. It stretches these muscles and brings blood flow, letting go of tension and healing pain.
This pose also offers relaxation and calming of the mind. Focusing on your breathing pattern increases body awareness and helps to gently stretch and let go.
It can reduce stress, tension headaches, mild depression, and fatigue. This is because it stimulates nerves along the lower back, calming the central nervous system.
Seated Forward Bend
The Seated Forward Bend is awesome! It’s great for cooling down after a hard workout. It stretches the hamstrings, lower back, and hips. It releases tension in the spine. Plus, it increases mobility and flexibility in the knees – reducing the risk of injury. It doesn’t matter if you’re flexible or not. Here’s how to do this pose:
Step-by-step instruction
Seated forward bend is a soothing yoga pose. It stretches lower back, hips and hamstrings. It relieves tension in the muscles around and supporting your knee joint. This pose increases flexibility and range of motion. It’s a great posture to cool-down after exercise and balance the body.
Step-by-step instruction:
- Sit with legs straight and wider than shoulder width apart. Flex feet so toes point up. Heels firmly press into the ground.
- Inhale, arms reach up to the ceiling and spine lengthens.
- Exhale, fold forward at waist towards toes. Let head hang heavy towards floor. Stay for as many breaths as comfortable.
- Gently roll up spine to release from pose.
Benefits of this pose
The seated forward fold is great! It stretches your hamstrings, hips, and lower back. It can relieve tension and fatigue after a workout. This pose also helps relax your mind and calm your nervous system.
When done right, you’ll feel a gentle stretch in your legs and back. It’ll boost your flexibility and reduce the risk of injury.
If you’re looking to increase mobility or loosen tight muscles, this is the pose for you! Just like any yoga exercise, it has benefits beyond the physical. You’ll be more mindful, and your breathing will be deep and controlled. And it’s emotionally calming – you’ll be able to relax and focus.
Reclining Hand-to-Big-Toe Pose
Supta Padangusthasana, or the reclining hand-to-big-toe pose, is a restorative yoga pose that is perfect for winding down after exercise. It stretches the hamstrings, hips, and calves, and helps ease the stress in the knees. This pose also can help with lower back pain and reduce stress.
Here’s how to do it:
Step-by-step instruction
Begin your yoga session at the front of your mat. Inhale and raise your hands above your head, palms facing each other. Exhale and lean forward from your hips, reaching down to touch the floor near your feet. Press your legs and keep your spine long. Engage your core muscles and press through the heels of both feet.
On an inhale, spread your hands shoulder width apart. On an exhale, take hold of the left foot’s outer edge with your left hand. Keep your hold light but firm. Push your foot into your hands to increase knee flexion.
Inhale and lengthen your spine away from the thigh. Extend your leg with toes pointed back until it’s parallel to the floor. Look up at the extended arm. Place your hand on your hip for extra extension if needed. Hold for 5 breaths then release your toes. Exhale and bring your leg and arms back to your side.
Repeat on the other side and enjoy a peaceful stretch after your workout!
Benefits of this pose
Reclining Hand-to-Big Toe Pose is also known as Supta Padangusthasana. It is a restorative, supine twist which is great for stretching the hips, legs, and lower back muscles. This pose releases tension and fatigue that comes with vigorous exercises.
Regular practice of this pose can help with digestion and soothe the nervous system. And, it can even regulate blood pressure. The hip flexors open up and the lower back is protected by contracting abdominal muscles when stretching. This strengthens the back. It also increases flexibility in the knees and ankles, protecting them from future injuries during physical activities. Lastly, it relaxes your mind and body, taking you into a deep state of relaxation.
Conclusion
Yoga can be a soothing way to cool down after an intense workout. Certain poses can help stretch and move the muscles in your knees and joints. They can also lessen the tension and pain in these areas. Hence, these yoga postures are great for cooling off and stretching your knees after exercise.
Summary of benefits and importance of stretching and cooling down after exercise
Once your exercise is done, cool down and stretch. This helps with breathing, your heart, and less soreness. Stretching improves flexibility, agility, and range of motion. Also, it calms tense muscles and helps with focus.
For knee tension, poses like standing half-moon, standing hero, seated Figure 4, and Bound Angle are great. Start with warm up like low lunge twists or sun salutations. Hold the poses for 15-20 breaths until you feel a mild but comfortable sensation in the targeted area. This will help with flexibility and better performance.
For optimal results, follow the guidelines for proper exercise. This includes monitoring physiological parameters according to industry standards. This helps with physical wellness, performance, and protecting joint health. It also supports local environmental interests and modern technological advances.
Frequently Asked Questions
Q1: What are some good yoga poses to cool-down and stretch my knees after exercise?
A1: Some good yoga poses to cool-down and stretch your knees after exercise include Child’s Pose, Pigeon Pose, and Reclined Hero Pose.
Q2: What are the benefits of stretching my knees after exercise?
A2: Stretching your knees after exercise can help prevent injuries, reduce muscle soreness, and improve joint flexibility.
Q3: How often should I stretch my knees after exercise?
A3: It is recommended to stretch your knees after each exercise session to help prevent injuries and improve joint flexibility.